Dragon Noodle Salad AND Sesame Tofu

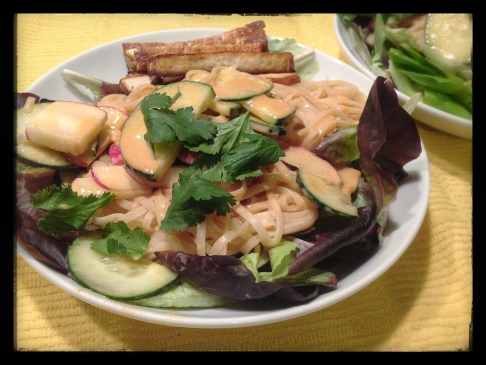
YES.  YES I LOVE THIS SO MUCH.  I knew I would like this.  It’s spicy sesame peanut noodles over lettuce.  How could it go wrong?  This is one of the first recipes I tabbed to make when I did my initial look-through of Isa Does It.  While I knew I’d like the salad on its own, I really wanted to make sure I had a substantial dinner, so I included the Sesame Tofu, cut into strips.  It was wonderful all together. 

Image

Initial thoughts – salad:  The dressing was spicy  and peanutty and so good.  The noodles were cooked just right, although I did have to cook them about a minute longer than the box told me to.  I loved the radishes and cucumbers.  I had a hard time incorporating lettuce into every bite, but I think it’s just because my lettuce chunks were too big.  This was SO GOOD as leftovers for lunch the next day, too.  I kept the lettuce separate until I was ready to eat, and I think that was a good idea. 

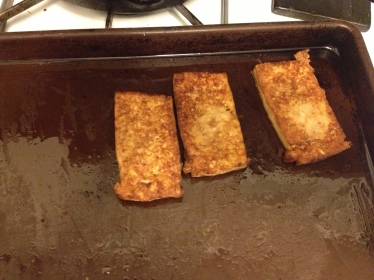
Initial thoughts – tofu:  Kinda boring all on its own, initially.  I cooked it in slabs . . . .

Image

and then cut it into strips for the salad.  As it sat and cooled down it got more and more delicious.  I liked the really cooked edges more than the centers, so I think I’ll cut the tofu into smaller pieces when I make this again.  This is a really simple recipe (3 ingredients!), so it’s totally worth making to throw into or on top of another recipe.  It does use the broiler, which is always a pain in the butt for me because i store an extra broiling pan in the broiler and then forget to take it out before I heat it up, and then what the hell do I do with this 500 degree metal pan?  I wouldn’t make it to eat on it’s own, I don’t think, but it’s perfect for a salad or sandwich.


Would I make it again (both):  Hell yes.  For the salad, smaller lettuce pieces.  For the tofu, I’d just cut it smaller before I broiled it.

Spinach and Black Bean Burrito Bowl

I suppose it’s time to start writing about the backlog of recipes I’ve already made.

First up:

Spinach and Black Bean Burrito Bowl!

Image

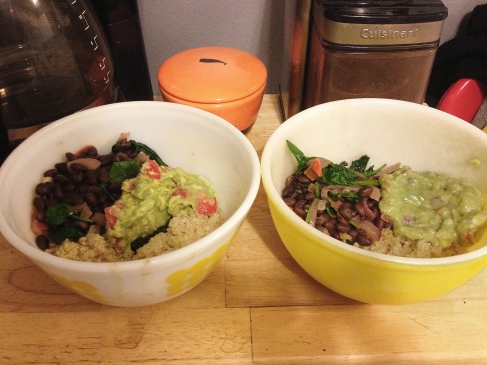
Initial notes:  This was really good.  I made it on a weeknight and it was quick and super easy.  It was really filling, and one helping was enough to fill me up.

The guacamole on top was key to the deliciousness (POST WITHIN A POST:  This guacamole is amazing.  Orange juice in guacamole is a serious guac game changer), and some Cholula hot sauce sprinkled on was also killer.

Would I make it again:  For sure.  Aaron requests the next time I use rice, though.  He doesn’t love quinoa, which is ridiculous.

I like this cookbook

I got Isa Does It for Christmas and it’s been directing me in the kitchen ever since.

I’ve liked every single thing I’ve made and I’ve loved most of them.

So. . . I’m going to cook through it.  The whole thing.  I’m terrible at blogging regularly, and I’m going to use this project as inspiration.

Yesssssssss!

Fried Spaghetti

We got home last night after being frozen out of a short backpacking trip (I have recipes and food info about that trip for you soon), and, as things usually go, we woke up hungry this morning.

I had nothing to make for breakfast, and not even enough soy milk for a bowl of cereal.

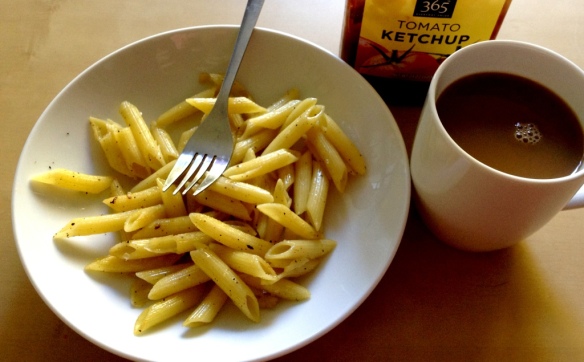
While perusing my fridge I saw a small container of leftover penne from last week. Fried spaghetti immediately was on the daily specials menu.

This was almost a breakfast staple in my house as a kid. My husband, however, had never had it before I made it for him. If we had leftover pasta and no more sauce, fried spaghetti was definitely going to be made in the next few days. I suspect my dad often made extra pasta just so he could be sure to have some lonely, leftover, naked pasta to work with.

The great thing about fried spaghetti is you can do anything you want with it. It’s fantastic with onions and green peppers, wonderful with spinach and mushrooms, and is even really good with vegan chorizo, tomatoes, onions, peppers, and a sprinkle of your fav vegan cheese (I like daiya for this). Essentially what you’re doing is making hash browns or home fries with noodles instead of potatoes.

This sad morning, however, the cupboards were bare, and I had mine with ketchup, which is how I suspect I liked it best as a kid.

20121008-105546.jpg

Here’s the basic method. If you’re fancying yours up, cook things like onions, peppers, and mushrooms before adding the pasta. Add things like spinach after the pasta gets a little crispy.

Heat a little Earth Balance in a cast iron skillet. When it’s all melted add whatever shape pasta you have (spaghetti really is the best, but anything works), and add a little salt and pepper. Cook until the pasta is crunchy and golden in some spots. Enjoy!!

Peanut Butter Caramel Apple Overnight Oats

Holy. Cow. These are awesome. Tastes like a peanut butter caramel apple.

Here’s the recipe for the overnight oats that used the caramelized apples I made and used in the muffins.

You should have enough apples left to make 2 jars of oats.

  • 1/2 cup rolled oats (NOT quick oats!!)
  • 1 Tbsp. chia seeds
  • 1 pinch of salt
  • 3/4 cup of soy milk
  • about 1/4 cup of caramelized apples and juicy caramely saucy stuff
  • 1 Tbsp. peanut butter

Put everything into a mason jar except the peanut butter.

Drop the peanut butter into the jar in little dabs. Basically, you don’t want one clod of PB in oats, so drop it in in little pieces.

Put the lid on and shake shake shake it up.

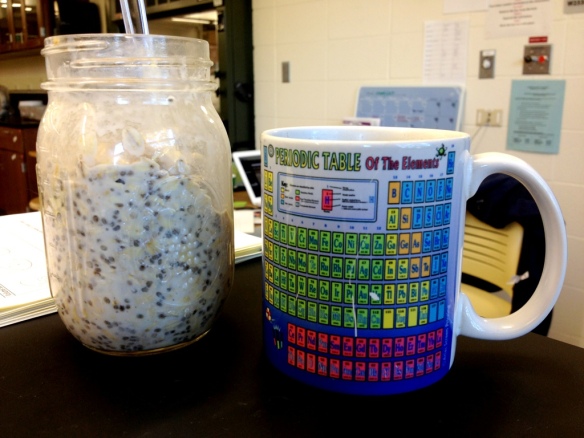
Put in the fridge overnight, and BOOM. Breakfast.

20121002-085105.jpg

A theme? And caramelized apples.

As I was eating my dinner of penne and delicious spaghetti sauce my mom made last August and froze, and then forced me to take several containers of because dammit, she had too much sauce in the freezer, I realized I also wanted dessert.  But I also needed to make sure I had breakfast the next day, and damned if I was going to prepare TWO extra items tonight.

And then it dawned on me:  I’ll make one thing and use it for both.  Which turns out is how I do a lot of things:  my lunch is almost always leftovers, I freeze a lot of stuff I make, and if something doesn’t taste good the first time, I mess with it the next day until it does.  I’m thinking that will be a major theme in my mofo this month.

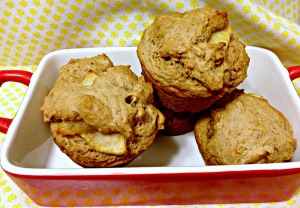
So. . . what did I make for dessert?  Caramelized apple muffins.

And how is that helping me with breakfast?  I used some of the caramelized apples to put together 2 jars of caramelized apple and peanut butter overnight oats.  Sheeeeeeeiiiiit, yes.

Caramelized Apples

  • 1/4 cup Earth Balance
  • 1/4 cup brown sugar
  • 3 apples, peeled and sliced thinly.
  • a pinch of salt

Melt the EB in a non cast-iron pan over medium-low heat.  Sprinkle in the brown sugar, and stir until it’s all mixed together.

Toss in the sliced apples and give them a stir.  Cook for about 3 minutes until you see the apples releasing a bunch of juice.  Sprinkle on the salt, and cook for another 5 minutes, or until the apples are nice and tender and maybe even browning a little.  Taste one, and if it tastes awesome and amazing and tender, then it’s done.

Caramelized Apple Muffins – makes 6 muffins

  • 1 cup unbleached white flour
  • 1 tsp ground flax
  • 1.5 tsp baking powder
  • 1/2 tsp cinnamon
  • pinch of salt
  • 1/4 cup brown sugar
  • 1 Tbsp. maple syrup
  • 3 Tbsp. canola oil
  • 1 tsp vanilla
  • 3/4 cup soymilk

Preheat your oven to 350°F and lightly grease a muffin tin.  Whisk together the flour, flax, baking powder, cinnamon, and salt in a medium bowl.

In a large bowl, whisk together the remaining ingredients.  Add the dry to the wet and mix with a wooden spoon until just mixed.

Fill 6 muffin tins halfway full with batter.  Drop  about 3 or 4 caramelized apple slices on the top of each batter pile.  Drizzle on a little bit of the saucy juices, and the top with another small scoop of batter.

Bake for about 20 minutes, or until a toothpick inserted in the center comes out clean.

Cool in the pans for 5 minutes, and then cool on a wire rack.

These are pretty good!

I’ll let you know how the oats are tomorrow morning.

Instagram Coasters

I love Instagram.

No big surprise there: it seems like everyone loves Instagram, and I think that’s awesome, because it means I get to look at a ton of cool photos every day.  I’ve always wanted to do something with my Instagram photos, and I’ve thought about having them printed onto canvas, having a giant poster made, and I even briefly considered getting a pillow made (but 95 bucks for a pillow?!  Whomp whomp).

I saw a great post on make great a while ago where Erica had some Instagram photos printed and then turned them into coasters.  I was sold.  I have always believed a drink isn’t quite ready until it is on a little square platform (I also still use two spaces after a period, though, so  . . .I don’t know if I’m a great person to take stylish advice from).

OK. Let’s go.  I got some photos printed.  I used PostalPix because I could choose my photos and pay directly from my phone.  I didn’t shop around at all, but there are a bunch of places that will print your Instagram photos,.

I also procured some white 4×4 ceramic tiles for THIRTEEN CENTS EACH.  I almost bought a hundred, just because I was amazed at how cheap they are.  In the end, I went with a manageable 8 tiles.  I also grabbed my jar of Mod Podge (I used satin finish because I don’t like shiny things, but I’m sure anything would be fine), and a foam brush.

Here’s what I did:
•    Wipe all the dust and cat hair off the tiles.  One tile at a time, spread a thin layer of mod podge on a tile, and then place your photo right on the tile.  I did my best to center the photos.
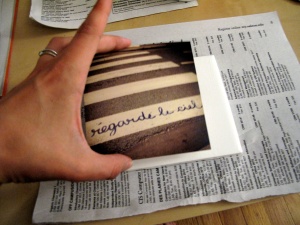

•    Wait for a while.  Longer than you want to.  I could only wait 10 minutes before my patience ran out, and that wasn’t quite long enough.  You want your mod podge to be pretty dry so your picture stays in place (mine didn’t and it was kinda annoying to deal with)
•    With the foam brush, apply a layer of mod podge on top of your photo.  Wait 20 minutes.
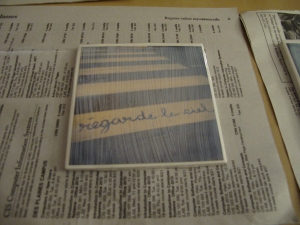

•    Add 2 more coats of mod podge, waiting between each coat.
•    Let these suckers dry overnight.
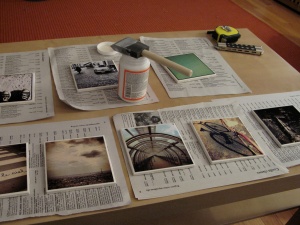

When I emailed Erica to ask if I could link to her blog post, she strongly suggested I finish and waterproof my coasters with an acrylic spray.  I used this one,and applied 6 coats, waiting about 10 minutes between coats.  I don’t have a backyard or a garage, which would be the best place to apply this stuff, but I was in the process of painting my kitchen.  I just put the tiles on a tarp in there, opened all the windows, turned on all the fans, and sprayed.
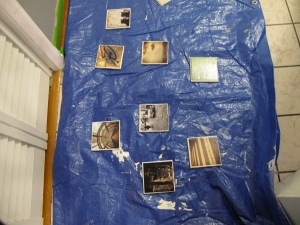

At this point, these suckers looked pretty awesome.

They weren’t really functional, though, because the back of the tile is pretty rough and not only was I scared to use them on my table, but there was an awful, frictiony  feeling every time I moved the coasters around.  Erica uses little felt pads on the back of her coasters, but I couldn’t find them anywhere (ok, I only looked in home depot, and they didn’t have them there), so I was hoping I could get away with skipping that step.  Turns out, I couldn’t.

I ended up cutting “squares” of felt out of some felt I found in my craft area and mod podging those to the back of the coasters and that works great.
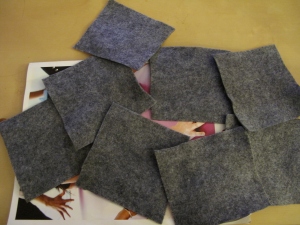
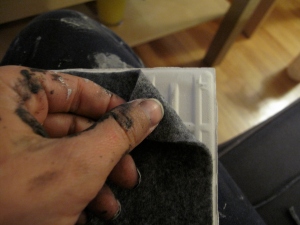
If you want to go the square route, I found the best way to attach the felt to the back is to moosh some mod podge onto the center of the back of the tile, smoosh the felt onto tile, and then add a little mod podge on the corners of your felt, and smoosh again.  This way, if your “squares” are super crazy, you can trim off any felt that pokes out in a very unattractive manner. Ugh, my hands were so painty.
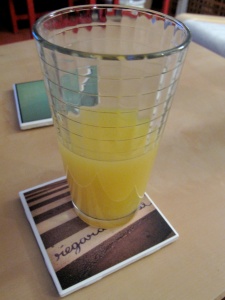
So there you go!  Your fancy orange drink now has a nice platform to rest on.

This is super cheap and it was so easy that I wasn’t even wearing pants for most of it.